


How to stamp concrete (Do-it Yourself)
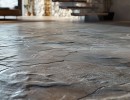
Stamped Concrete is the process of pressing natural stone impressions into wet concrete using rubber stamp mats. This is a great way to create a unique flair to exterior or interior project including pool decks, walkways, driveways, patio, or walls.
GlobMarble manufacture industrial grade concrete stamp mats for decorative concrete stamping. GlobMarble stamp mats manufactured in USA, from made in USA high quality urethane rubber. GlobMarble stamp mats designed to be used repeatedly for a very long time. Detailed impression guaranteed.
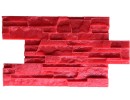
GlobMarble concrete stamp mats are used to imprint natural stone, wood grain, tile, brick pattern or other finishes on concrete.
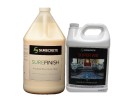
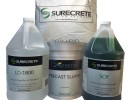
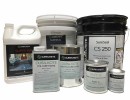
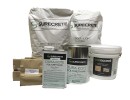
GlobMarble offer complete line of concrete stamp finishing tools and decorative concrete supplies as concrete sealers, concrete colors, powder and liquid release, concrete stamping overlay materials, concrete stamps, concrete flex mats, touch up skins and other concrete stamping tools.
Many of GlobMarble concrete stamp mats available in 3 unique patterns (design variations).
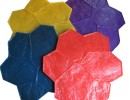
Rigid mats color coded typically red, blue and yellow. Each stamp has a unique pattern variation to lend an authentic look and achieve a more random appearance.
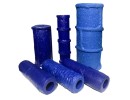
Flexible mats used for details and edges(not color coded).
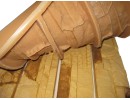
Rigid (Thick) mats thicker than flex, have nylon handle inserts. Rigid stamp mats used to stamp the majority of the stamping job. The Floppy/Flexi mats do not have handles thinner than rigid mats that allows to band flexible mat at a 90-degree angle. Flexible stamp mats are used to finish edges of the pattern, spots against the wall, stairs, corners and hard to get areas.
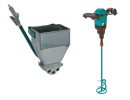
Chisels and wheel rollers used to clean grout lines between stamps for edges finish where the stamp mats cannot reach.
Planning
Choose stamp texture and concrete color for your stamping project.
Always place mats in the stamping area prior to the concrete pour for a stamping lay out. Make sure enough stamping mats available to complete your project. You should have enough stamps to line up across the widest part of your project, and additional one or two mats to start another row. Casted concrete slab generally should at least four inches thick.
Concrete coloring option
There is a 2-basic concrete coloring technique.
Integral colors
Integral colors added directly to the truck or concrete mixer while the concrete is mixing to get a consistent color throughout the concrete slab.
Broadcast Method
Broadcast the color by throwing hardener into the freshly poured concrete surface. Give it five to 10 minutes to absorb water from the concrete and then float the color into the surface. Apply a second layer of hardener to ensure complete coverage.
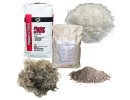
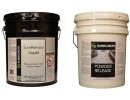
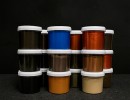
Concrete Powder Release
Powder Release is used as a secondary coloring system for stamped concrete and prevent sticking fresh poured concrete to stamp mats. The primary concrete color will
dominate and approximately 20% of the release agent will adhere to the surface of the concrete.
Concrete Powder Release is dusted on the concrete surface and stamp mats before stamping.
How to stamp concrete (Do-it Yourself)
Cleaning
Cut your control joints with hand grinder in ¼ the depth of the slab ASAP, usually in 12-24 hours after concrete pour. Use chisel to touch up grout line imperfections. Wash off the excess release with a garden hose and brush.
-
Install formwork the same as any other concrete pour.
-
Protect all surrounding areas with plastic.
-
Pour colored concrete, screed and float the same as any other concrete placing if you’re prefer integral coloring method. If you prefer Broadcast Coloring method, Broadcast the Color Hardener powder directly to the freshly poured concrete surface evenly without leaving any piles. The best way to apply a Color Hardener is with a dry masonry brush by dripping the brush into the pail of Color Hardener and fluff it to load the bristles and coat them evenly. Then take the masons brush by the handle, holding it below belt level, and use your wrist to flick the Color Hardener onto the surface in a light, uniform layer.
Once color hardener penetrates the top of the concrete slab and the bleed water ceases and the color fully wets up, use magnesium or wood float to work the color into the surface. Repeat this process in areas where natural concrete is showing through.
Time is critical. Work should proceed without delay. Inspect the area periodically. Necessary touchup work can begin as soon as possible. You can start stamping when the stamp can support your weight on the concrete without sinking in more than the grout and relief. Place a stamp on the concrete and step on it, the stamp should hold your weight and not slide around or sink too deeply into the surface. Surface delay can be applied over the concrete to prevent drying to fast. When you start stamping the curing process starts as the concrete will continue to get stiffer especially in the end of your project.
-
Apply release agent prior stamping.
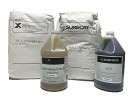
Powdered or liquid release agents serve very important purpose in stamping concrete process. Release agent used to prevent the stamping mats or skins from sticking to the concrete and disturbing the imprint texture. Powder release will add more depth to the texture impart subtle color contrast to your stamped concrete job.
The best way to apply a powdered release is with a dry masonry brush by dripping the brush into the pail of release and fluff it to load the bristles and coat them evenly. Then take the brush by the handle, holding it below belt level, and use your wrist to flick the release onto the surface in a light, uniform layer.
The liquid release is a much easier and cleaner method but will leave no secondary antiquing color highlights which are achieved with the powder method.
Use a pump sprayer to apply the release in a uniform layer onto the surface of the concrete and stamp mats right before you stamp. If you plan to use a tinted liquid release agent, add the tint a day or two beforehand if possible. This will allow the pigment particles to fully dissolve.
-
Stamping
Pre-texture the slab perimeter about 1 to 2 feet with a texturing skin or flex mat. When you're working with rigid stamps, the tool will overlap the surface edge and wouldn’t be able to fully depress it into the concrete edges.
The first stamp mat should be carefully aligned, placed and tamped in at the starting point of the project. Use an impact tool "tamper", DO NOT OVERTAMP. Repeat the process by placing the second mat next to the first. Place mats tightly together to avoid messy grout line patterns. Continue running stamps, by lifting the earliest stamp mat placed and apply it in sequence. Place Stamp Mats and walk them in until full texture is achieved. A minimum of three rigid stamp mats should be used for smaller project like sidewalks.
Always stamp with a stamp mat against a stamp mat before moving. Use flexible stamp mats and touch up skin mats against walls. Avoid creating a vacuum when lifting stamp mats by curling in the corners or edges of tools while lifting. Periodically check stamping alignment and adjust if necessary. Fix any material that has squeezed up between stamp mats after lifting stamps with grout-wheel chisel or S-tool. Typically, one person places the stamp mats by stand on them while moving the stamp mats from the first row and leapfrogging them into the next row. While this person is moving and advancing the stamp mats, another person tamping.
-
Water based stain or antiquing color can be applied to the concrete surface to create a secondary or antiquing color prior Sealing.
-
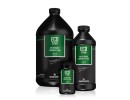
When the concrete is fully dried, usually in several weeks later after light surface cleaning, use solvent resistant roller cover to Apply Concrete Sealer (2 thin coats recommended). Slip resistant material can be added to the 2nd coat.
Stampable overlay product for interior and exterior application over existing concrete surface
Read More: