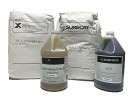
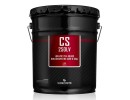
ColorTec 180 is a two component, fast drying, thick build, high gloss, pigmented polyaspartic sealer most commonly used for full broadcast flake floor applications.
Its short worktime of ten minutes limit it for professional use only. However, every professional was once a rookie so we recommend inexperienced contractors who are interested in providing one-day flake floor services to make a test/ sample on a hardie backer board. This will familiarize you with the fast-paced technique required to provide one-day installations.
Many businesses would prefer to get their flooring renovation done during off-hours and be ready to open back up the next morning. With most polyaspartic / epoxy jobs, this is not an option due to the long cure times of the material. ColorTec 180 changes the game by allowing experienced contractors to have a turnaround time of as little as six hours. Large retailers will be much more willing to close their doors early and have work performed overnight than to be unavailable to their customers for an entire business day.
*Please note that all ColorTec products are mixed to order and are non-returnable and non-refundable.*
Cure rates @ 80 F (27 C)
Cure rates @ 40 F (4 C)
Dry to touch: 2-3 hrs
Dry to touch: 6-8 hrs
Light traffic: 6-8 hrs
Light traffic: 24 hrs
Heavy traffic: 48-72 hrs
Heavy traffic: 4-6 days
Full cure: 48-72 hrs
Full cure: 5-7 days
Surface Preparation:
Before applying any sealer to concrete, the surface must be prepped to ensure a proper adhesion of topcoat to surface. Missing any parts of the surface prep will most likely result in the sealer flaking off. Ensure you get the most out of our product by following these steps.
Make sure that the concrete is fully cured. Most concrete is fully cured approximately 28 days after pouring it even though it feels hard to the touch long before this point. To see what happens if this step is not followed you can watch this video.
Be sure that the concrete is not retaining any moisture. This problem is common in basements and humid environments, and will result in flaking and bubbling under the sealer. To check if your concrete is too moist you can tape all 4 sides of a plastic sheet to the concrete. If there is condensation under the plastic sheet after approximately 16 hours, your concrete is too wet.
Clean and profile the surface. Contaminates on your surface will prevent the sealer from adhering to your concrete, and sometimes they may cause the sealer to cure improperly. A few examples of common contaminates are dust, dirt, grease, oil, curing agents, paint, efflorescence, glue, rust, algae, and mildew. To clean the concrete, you may grind or shotblast the surface. This will both clean any contaminates off of your surface and also profile it. The pores of the concrete will be opened up and have a much stronger bond with the sealer.
Patch any small hairline cracks with a product like featherfinish so that they will not be visible after the sealer coating is applied. For larger cracks or uneven floors, we recommend using a self-leveling compound to make the floor as even as possible. Any high points or peaks should be grinded down.
Any walls that touch your floor should be taped off with painters tape to avoid getting sealer on them.
Mixing:
We recommend setting up a mixing station on unopened trash bags for the easiest clean up. Place it in a location that will not block the progress of your application. Staging is critical so that Part A and part B are not confused with one another or mixed too far in advance.
Mix the pigmented Part A of the sealer with a jiffy mixer at medium speed or 1 minute to disperse all the pigment properly.
Pour 1 Part B into 3 Parts A. The kits come premeasured but you may mix smaller amounts by mixing by volume.
Mix the Part A and B for 2 minutes at a medium speed.
Set aside the mixer to be cleaned with denatured alcohol at a later time.
Application:
Once A and B are mixed, the catalyzed product should be placed on the floor within 10 minutes. If left in the pail too long, product will cure at an accelerated rate rendering it useless.
Lay a thin “ribbon” of ColorTec 180 across the length of your floor.
Roll it out with a roller designed for sealers. For smaller projects you can use a standard 9-inch roller, but for larger projects we recommend using a larger one. We recommend to “de-fuzz” your roller by rolling it over some blue painters tape.
The hard-to-reach areas by the corners of your walls can be touched up with a small 6” roller.
Repeat steps 1-3 until the whole surface is covered. Apply product in an area that can comfortably be covered with the material on a wet roller. Before the roller begins to dry out, become tacky and “pull”. Thin coats are imperative.
We recommend having a second worker backroll the polyurethane while wearing spike shoes to make sure there are no visible roller marks and that all the material is evenly dispersed on your floor.
Once the floor is covered, broadcast your flakes over the wet sealer.
After 2-3 hours, the floor should be cured enough to continue your flake installation. Use a steel floor scraper to scrape off any loose or vertical flakes.
Use a leaf blower to blow all excess flakes into a corner, where they can then be shoveled back up and reused for the next job
Vacuum the floor to remove any flakes the leaf blower missed.
You can now apply our fast set clear coat GP-20 to lock the flakes in place. The job can be finished in as little as 6 hours.
Frequently Asked Questions About Commercial Grade High Gloss Colored Floor Polyaspartic Coating:
Q: What's the difference between a Colored Floor Polyaspartic Coating and Epoxy When Flaking a Floor?
A: Pigmented polyaspartics, in most cases, cure and dry faster allowing for the applicator to have less down time before the floor can go back into use. Surface preparation is the same for both epoxy and polyaspartic flake flooring systems.
Q: Who should attempt to use colored floor polyaspartic System?
A: Due to the nature of the speed of Polyaspartic coatings, they have been specifically designed for trained professionals who have learned the essential timeframes for mixing, application, drying and re-coat timelines. First-time contractors and do-it-yourself applicators are NOT advised to use this line.
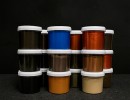
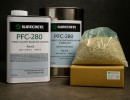
Q: The pigment in my container of PFC-280 looks like it has separated, is that bad?
A: No. That can be a normal situation for all pigment used to create the color chosen. The pigments will not stay suspended forever. When this occurs, it is not a sign that the product is bad. Utilizing a resin mixing blade on a low to medium speed setting, mix the product up until all color is dispersed evenly into the product. Some color residue may be present, but will finish mixing in once you start the process of mixing the curing agent into “Part A”.
Q: Do I have to mix Dura-Kote Polyaspartic as long as instructed?
A: Yes, this timeline is essential. In some cases, such as in cooler temperatures, increasing the mixing time would be appropriate.
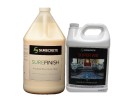
High Gloss Clear Polyaspartic Floor Coating - Dura-Kote DK-120 from SureCrete DesignPolyaspartic Floor Sealer DK-120 is a specially formulated hybrid,..
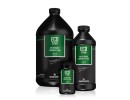
GlobMarble GP-20 is two component 85-90% solids aliphatic - high gloss polyaspartic sealer designed for application over interior concrete, cement-bas..
GlobMarble GP-20 is two component 85-90% solids aliphatic - high gloss polyaspartic sealer designed for application over interior concrete, cement-bas..
ColorTec 180 is a two component, fast drying, thick build, high gloss, pigmented polyaspartic sealer most commonly used for full broadcast flake floor..
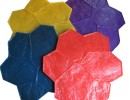
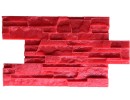
Plastic molds for concrete stonePAVER STONE PLASTIC MOLDSApplication areas for paving stones include residential terrace, schools, traffic and pedestr..
Plastic molds for concrete stonePAVER STONE PLASTIC MOLDSApplication areas for paving stones include residential terrace, schools, traffic and pedestr..
Plastic molds for concrete stonePAVER STONE PLASTIC MOLDSApplication areas for paving stones include residential terrace, schools, traffic and pedestr..


")
")
")
")
")
")
")
")
")
")
")
")
")
")
")
")
")
")
")
")
")
")
")
")
")
")
")
")
")
")
")
")
")
")
")
")
")
")
")
")
")
")
")
")
")
")
")
")
")
")
")
")
")
")
")
")
")
")
")
")
")
")
")
")
")
")


")
")


