-
Your shopping cart is empty!
MENU
Your shopping cart is empty!

Thank you for your purchase! We appreciate your business and hope to serve you again soon.
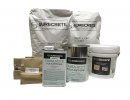
Rubber mold price list is attached. We are continuously creating new molds every month and will keep you updated.
Our company is a mold manufacturer and can make any custom molds.
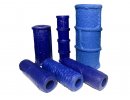
GlobMarble supplies professional grade casting molds which replicate the structure and relief of natural stone to the smallest details. Molds made of two-component polyurethane or silicone rubber proved their high quality and durability. When handled with care the molds life span last for years and allows making plenty of casts. The molds are designed to cast many parts and will last you many years by using a little common sense and incorporating a maintenance plan. Proper care, maintenance, and storage as well as some simple mold maintenance techniques will do more for you than a warranty.
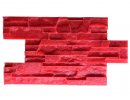
Rubber molds have the abrasion resistance and tear strength needed to keep production moving. Casting concrete into rubber molds lets you make perfect copies of any original every time!Molds are ready for casting same day and last in production...saving you time,labor, and material costs. Urethane molds are used every day by professionals to make architectural elements, concrete stone veneer, formliners, concrete countertops, GFRC panels, concrete statues and furniture and the list goes on.
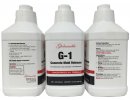
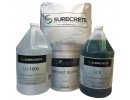
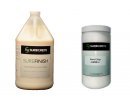
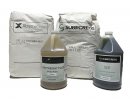
GlobMarble offers mold release agent for concrete stone manufacturers
Release agent will aid in releasing concrete or gypsum plaster castings from rubber molds. Release agent provides a clean, positive release and does not interfere with or affect surface detail and helps minimize air bubbles in finished castings. Properly used, mold release improves molding efficiency for a variety of casting applications and will actually lengthen the life of your production mold.
If you don’t have concrete release agent, you can try dishwashing soap and water mixed at 10 parts water to 1 part soap. Rinse the mold with soap solution and immediately cast your concrete.
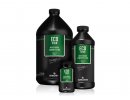
GlobMarble water soluble release agent will aid in releasing concrete or gypsum plaster castings from GlobMarble rubber molds. Concrete ReleaseAgent provides a clean, positive release and does not interfere with or affect surface detail and helps minimize air bubbles in finished castings.
Simplify Your Production Casting with GlobMarble Concrete Release Agent
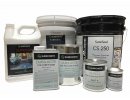
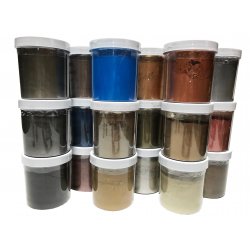
Our Oxide pigment is a dry powder that can be used to add color to concrete, stucco, plaster, mortar,grout, countertop mix and other cement materials. It is also used in the ceramic industry.
Please refer to measuring chart for pigment dosage and authentic color at Oxide pigment page
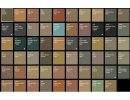
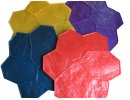
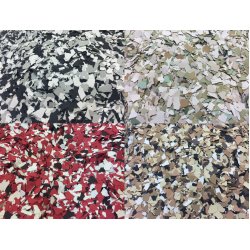
Photos of colored concrete tiles
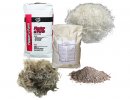
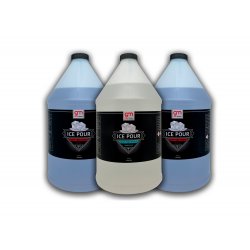
Concrete Fast Setting Additive
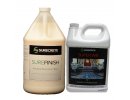
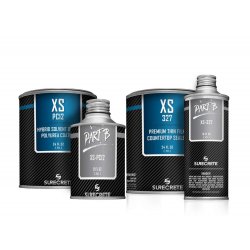
Concrete Additive-Water Reducer-Super Plasticizer
This instruction sheet provides you with information on all aspects of preparation and castings for use in your home and garden.
For Manufactured Stone Business opportunity please browse the web page: globmarble.com/concrete-stone-manufacturing-process.htm
How to make concrete stone, casting and coloring video.
You can buy pre-mixed bags of ready-to-mix concrete. These simply require water and mixing; the measuring is already done for you. An 80 lb bag (on average) will make 4sq. feet x 2.5" thick. A more economical method is to make your own concrete, using this simple time-tested formula as a guide - 1:2:3parts by dry volume - one part Portland cement, two parts sand, three parts coarse aggregate. For molds under 2" in thickness, use aggregate that is no more that 1/4" in size or large particles coarse sand. For thin molds as a Mosaic Stone Molds or thin Brick Stone Molds can be used QUIKRETE® Sand Mix for pouring overlays less than 2" thick. GlobMarble Fast Set Concrete Additive is a special blend of cement with specifically graded fine & coarse aggregates. Sets form 30 minutes to few hours (depends to the additive percentage) allowing time for mixing, pouring and finishing.
To make your own Sand Mix, follow the direction:
Take 2-3 parts of sand (mash 20-40), 1 part of Portland cement. If using dry cement colorant add it here, (if using liquid color add to the first bit of water you put in). Add the additives to the first amount of water that you add or to the dry concrete mix. Remember to add water a small amount at a time. Continue to add water until the mix is the consistency of toothpaste(recommended water to cement rate 0.20-0.30 by cement weight depends to the concrete mix). Put the mix over the mold and vibrate.
Concrete is a composite construction material, composed of cement (commonly Portland cement) and other cementitious materials such asfly ash and slag cement, aggregate (generally a coarse aggregate made of gravel or crushed rocks such as limestone, or granite, plus a fine aggregate such as sand), water and chemical admixtures.
Concrete solidifies and hardens after mixing with water and placement due to a chemical process known as hydration. The water reacts with the cement, which bonds the other components together,eventually creating a robust stone-like material.
Here are few casting options:
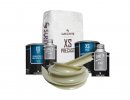
As an example, we’ll use GlobMarble VS 501 mold
Always apply release agent to your mold prior casting concrete. We're offer concrete release agent concentrate
VS 501 mold casting weight is about 20 lbs. (10 kg.)
1x2 cement to filler mix as follows: (you can also mix 1-part Portland cement to 3 parts sand (filler), plasticizer and water has to be re-calculated by cement weight)
6.7 lbs. (3 kg) Portland cement (white for light stone colors) (gray for dark stone colors)
13.3 lbs. (6 kg) Sand (20-30 mesh recommended) (silica sand or "all-purpose" sand works great)
2 lbs. (913 g) Water(6.7 lbs. of cement x .30) (recommended water to cement ratio 20-30%) (Lower water ratio if your mix to liquid)
0.067lbs (3 gram) Super-plasticizer (6.7 lbs. of cement x 1%)
For best result always add dry pigments to your mix prior adding a water. Mix concrete with pigment and additives few minutes, then add water (mix at least3-5 minutes). You can also add Super plasticizer to the water 10-15 minutes prior casting, then mix with dry ingredients.
Please note: Concrete minimum mixing time 3 minutes (it takes few minutes until Super Plasticizer absorbs to cement and start reaction)
To color different molds sections, brush color over the molds selected sections, then cast the concrete.
Cover the mold with plastic. Remove the stone from the mold in 12-24 hours.
Always apply release agent to your mold prior casting concrete. We're offer concrete release agent concentrate
VS 501 mold casting weight is about 20 lbs. (10 kg.)
Recommended mix as follows:
1x2 cement to filler mix as follows: (you can also mix 1-part Portland cement to 3 parts sand (filler), plasticizer and water has to be re-calculated by cement weight)
5.36 lbs. (2.44 kg) Portland cement (white for light stone colors) (gray for dark stone colors)
1.34lbs. (0.7kg) CSA Additive (20% of the cementitious material)
Total cementitious material weight 6.7 lbs. (3 kg)
13.3 lbs. (6 kg) Sand (20-30 mesh recommended) (silica sand or "all-purpose" sand works great)
2 lbs. (913 gr) Water (6.7 lbs. of cementitious material x .30) ( recommended water to cement ratio 20-30%) (Lower water ratio if your mix to liquid)
0.067lbs (3 gram) Super-plasticizer (6.7 lbs. of cementitious material x 1%)
For best result always add dry pigments to your mix prior adding a water. Mix concrete with pigment and additives few minutes, then add water.
To color different molds sections, brush color over the molds selected sections, then cast the concrete.
Please note: Concrete minimum mixing time 3 minutes (it takes few minutes until Super Plasticizer absorbs to cement and start reaction)
Cover the mold with plastic. Remove the stone from the mold in 2 hours (approximately). How to cast corner mold instruction
How to cast corner mold instruction
1-part Portland cement + 2-part sand + 3-part gravel (stone)
Water (.25-.35 x cement weight)
Super-plasticizer (1% form cement weight)
Stone veneer casting and coloring video: https://globmarble.com/video-howto/
Use the minimum amount of water possible while still keeping the mixture workable. The less water used, the stronger the dried, finishing product will be. As an option you can use concrete water reducer, more info below
Ensure that it is evenly and completely mixed.
Use the same amount of water for additional batches to be mixed, and work fast to keep dry lines from forming. This is where the concrete is already drying and the transition to the new, water mix will be clearly visible and create weak point.
1. Always apply Release agent on your molds prior casting.
Release agent will aid in releasing concrete or gypsum plaster castings from rubber molds. Release agent provides a clean, positive release and does not interfere with or affect surface detail and helps minimize air bubbles in finished castings. Properly used, mold release improves molding efficiency for a variety of casting applications and will actually lengthen the life of your production mold.
If you don’t have concrete Release agent, you can try dishwashing soap and water mixed at 10 parts water to 1 part soap, Rinse the mold with soap solution and immediately cast your concrete.
2. After pouring, shaking side to side and tapping the sides will draw most air and water away from the surface of the mold helping to avoid surface voids and air bubbles. This is an important step and should not be missed. Here are few remedies you should try, if you are getting air bubbles in the concrete:
a) Most important, you must shake the mold vigorously, side to side, immediately after pouring the concrete.
b) Pour only a 1Ž4 of the concrete, into the mold and vibrate that portion first, then add the remaining concrete and continue shaking.
Concrete can take anywhere from 8 hrs. to 24 hrs. to set, it all depends on what concrete mix is used, weather conditions, the size of the mold, and the amount of water used. The cycle time can be reduced further by using only enough water in the mix as is absolutely needed, or using a faster setting concrete mix. Professional concrete casting companies will use between 0.25 to 0.35 percent water, this will aid in hardening the mix as fast as possible.
Do not store the curing concrete stone in direct sunlight for the first 7 days, at least. The best way to store the stones is by covering them in plastic at temperatures above 70 degrees for about 12 hours. We have successfully cured concrete stone at 120 degrees, while covered in plastic. The plastic prevents excessive moisture loss and maintains heat of hydration to ensure a proper initial cure.
MAKE SURE TO LET THE STONE SIT FOR AT LEAST 7 DAYS BEFORE YOU APPLY THEM TO A WALL.
A light weight concrete mix can be used for a wall veneer stone, or patio applications to make light weight concrete, substitute some of the aggregate with pumas stone, styrofoam beads, or perlite - even wood chips.
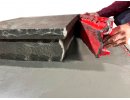
You do not have to forgot the look of real stone, simply because you have chosen to landscape with concrete. And, next to using a highly-detailed mold, the most important step is coloring the concrete. There are several proven methods and a variety of quality products available to help you create a natural appearance.
WARNING!
BE SURE YOU HAVE COMPLETE COVERAGE OF MOLD RELEASE ON YOUR MOLDS BEFORE POURING A SLATE COLORS. MOLDS MAY BE DIFFICULT TO CLEAN AFTER POURING THIS COLORS CLEAN THE MOLDS IMMEDIATELY WITH WARM, SOAPY WATER.
Vibrating Table:
How to make inexpensive vibrating table for DIY project
Vibration table is required for commercial stone production. More detail here.
Dry pigment, made from Iron Oxide, is a common colorant used for dyeing concrete, they come in a variety of earth tones - brick reds, brown, ocher, umber, etc. During the mixing process, these powders can be added, a small amount at a time until the desired color is achieved. For a mottled look, a small amount of dry pigment can be sprinkled and smudged into the mold, prior to pouring the concrete. Try using 2 or 3 complimentary colors, this will give a random appearance to the stone. For a rougher finish, sprinkle baking soda into the mold. To get a marbled effect, mix the concrete, then separate a small portion from the larger batch and add the dye. Return the mixture to the larger batch and stir it - just enough to create swirls. You can repeat this procedure, using different colors each time. Make sure that you keep a record of the quantities, colors and techniques used, in order to duplicate your results.
To get each rock different color you should use in mold coloring technique. You can sprinkle dry pigment or brush premixed liquid pigment on mold.
In mold coloring technique available at https://globmarble.com/video-howto/
Add concrete color "dusting" to get the color-blending of natural stone you want:
Take a paper cup and punch a few tiny holes in the bottom of it. Fill it halfway with either Brown or Dark Chocolate Brown powdered concrete color (I'm assuming that you have some of our powdered concrete colors). Hold the cup over your oiled molds and tap the side of the cup lightly. This will cause the color to sprinkle down and give you a DUSTING effect. Apply the color into the molds randomly. You just want a very light coating. Turn your mold upside down and tap the mold once or twice to dislodge any excess color that sticks to the oil (mold). Now you are ready to pour.
Use gray cement for a dark stone base colors and white cement for a light stone base colors. You can also create the base color for your manufactured concrete stone by adding pigment to you concrete mix.
You can take advantage of the porous nature of concrete, by using a concrete stain. These masonry stains act just like wood stains and are absorbed into the top one-sixteenth inch of the concrete. The pigment is highly colorized and available in a multitude of earth tone hues. Concrete stains can also be used to restore previously-stained concrete, as this product will fade overtime.
A color wash is a technique that allows an accent color to be absorbed into the nooks and crannies of the stone. It can be achieved by mixing iron oxide pigment and water into a slurry with the consistency of a thin soupy mix. This procedure should be applied to the castings after demolding and while it is still uncured, this allows for better chemical bonding between the wash and the concrete. To apply the wash, brush the entire surface, especially into all the recesses. Once this is done, take a clean, moist cloth and wipe only the very top surface. With a few passes – a depth of color that highlights the natural look of the casting.
1. Concrete can take anywhere from 15 min to 24 hrs. To set it all depends on what concrete mix is used, weather conditions, and the size of the mold. After release, additional drying can be done out of the molds
2. Our molds are custom-made from a flexible rubber that allows the concrete castings to be released quite easily.
3. Make sure that the concrete has dried and hardened before you try to release it from the mold, concrete will shrink slightly, during the hardening process, and will be easier to remove, just turn the mold over and pull with even pressure from the edges, do not use tools to pry the part out, as this can damage the part and mold.
4. Clean the mold with water, or soft brush after each use.
Do not apply fresh released stone to the wall. Make sure to let the stones sit for at least 7 days before you apply them to a wall. Do not store the curing concrete stone veneer in direct sunlight for the first 7 days, at least. The best way to store the stones is by covering them in plastic at temperatures above 70 degrees F. We have successfully cured concrete stone veneer at 120 degrees, while covered in plastic.
Install Stone Veneer on an Interior Wall: Prep
Install Stone Veneer on an Interior Wall: Part 2
Concrete is used for everything from patios and driveways to cast sculptures. It is versatile, weatherproof, and inexpensive to use, if you are willing to put the effort into it that using it requires.
Combining water with a cementitious material forms a cement paste by the process of hydration. The cement paste glues the aggregate together, fills voids within it and allows it to flow more freely.
Less water in the cement paste will yield a stronger, more durable concrete; more water will give a freer-flowing concrete with a higher slump. Impure water used to make concrete can cause problems when setting or in causing premature failure of the structure.
Hydration involves many different reactions, often occurring at the same time. As the reactions proceed, the products of the cement hydration process gradually bond together the individual sand and gravel particles and other components of the concrete, to form a solid mass.
Fine and coarse aggregates make up the bulk of a concrete mixture. Sand, natural gravel and crushed stone are used mainly for this purpose. Recycled aggregates (from construction, demolition and excavation waste) are increasingly used as partial replacements of natural aggregates, while a number of manufactured aggregates, including air-cooled blast furnace slag and bottom ash are also permitted.
Decorative stones such as quartzite, small river stones or crushed glass are sometimes added to the surface of concrete for a decorative "exposed aggregate" finish, popular among landscape designers.
The presence of aggregate greatly increases the robustness of concrete above that of cement, which otherwise is a brittle material and thus concrete is a true composite material.
Concrete Additive-Water Reducer-Super Plasticizer
GlobMarble super plasticizer is especially optimized for plastification and water reduction of cementitious construction materials.
Super-plasticizer provides an excellent development of early strength. Many important characteristics of concrete are influenced by the ratio (by weight) of water to cementitious materials (w/cm) used in the mixture. By reducing the amount of water. The cement paste will have higher density, which result in higher paste quality. An increase in paste quality will yield higher compressive and flexural strength, lower permeability, increase resistance to weathering, improve the bond of concrete and reinforcement, reduce the volume change from drying and wetting, and reduce shrinkage cracking tendencies. There are many admixtures and additives for use with concrete mixes, but these are usually only available or practical with ready mixed concrete. They can reduce shrinkage, which causes cracks, increase working time, or speed up the setting process, and change the color and/or texture of the finished product. With a relatively low dosage (0.5–1% by cement weight) they allow a water reduction up to 40%, due to their chemical structure which enables good particle dispersion. Plasticizers increase the workability of plastic or "fresh" concrete, allowing it be placed more easily, with less consolidating effort. A typical plasticizer is lignosulfonate. Plasticizers can be used to reduce the water content of a concrete while maintaining workability and are sometimes called water-reducers due to this use. Such treatment improves its strength and durability characteristics.
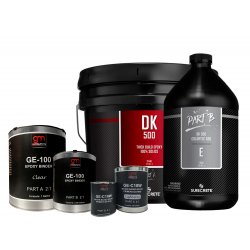
How to cast decorative stones from Gypsum/Plaster
How should I store my rubber mold?
People often underestimate the importance of proper storage of their molds. Improperly storing a mold can damage it and possibly render it unusable.
Proper mold storage: Clean the mold cavity with a sponge and soapy water and let dry.
Cast plaster into the mold and let dry. Do not demold. You will be storing the mold with the plaster casting in it to help maintain dimensional stability.
If possible, place the mold with the casting in it in a black plastic garbage bag and seal tightly.
Place on a flat level surface. We’ve heard from customers that have inadvertently stored their molds with objects under them, causing the mold to permanently distort.
Store in a cool, dry environment out of ultraviolet light.
We are proud to make available innovative decorative concrete products. GlobMarble carries the full line of decorative concrete supplies, Concrete Overlays, Concrete Countertop supplies, Lightweight Concrete mixes, Vertical Concrete Coatings, Eco-Friendly Concrete Stains, Low VOC Sealers and much more. To see these products click here
We are setting a new standard in decorative precast concrete, overcoming the limitations of traditional concrete while maintaining the qualities that have drawn people, to become the new material of choice for designers and home owners.
Thank you very much for your attention and look forward to your reply soon!
Thank you for positive feedback.
Join us on Twitter: https://twitter.com/GlobMarble
Join us on Facebook: https://www.facebook.com/GlobMarble
Join us on Google+: https://plus.google.com/u/0/104012929481409233715